Struts – The Lost Construction Toy

Ever remember something from your childhood that no one else knows? Struts is a bit like that.

Struts is a plastic construction toy that was manufactured in South Australia in the late 1970s and early 1980s. Billed as an educational toy, Struts won a number of design awards including 1978 Australian Toy of the Year, 1981 Australian Toy of the Year and 1982 Australian Toy of the Year. However despite Struts’ critical acclaim, the toy seems to have vanished from the collective consciousness. Lists of construction toys include lego, Mechano, Fischertechnic and many others, but Struts is always missing.

It seems likely that it’s limited Australian market and short lifespan mean that the toy probably never reached America or Europe in any quantity, and so languishes forgotten in boxes and sheds of Australia. Until now! This page contains all the information you’ve ever wanted on Struts educational toy, and probably a bit more. Sourced from images found on auction sites and from original booklets I think I can answer pretty much all your questions.

If you’ve found this post you’re probably a construction toy enthusiast, or Australian child of the 70’s and 80’s like myself. Like me you probably searched Google, trawled through Wikipedia and hunted on Ebay in the hope that just maybe, someone else remembered a favourite childhood toy. Did it exist? What happened to it all?

I can assure you it did indeed exist. Struts educational toy was a big part of my childhood. In fact, the company that manufactured Struts (Motley Manufacturing) bought my father’s business when I was a kid. Myself and couple of other employees children were used as the models for the box sets. Yes, that’s right, I actually appear on a box of Struts. Sadly my mint empty boxes that I was given as a kid have disappeared, victim of many moves and teenage disinterest. The toys themselves probably went at a garage sale or as a donation at some point. So now I’m seeking them out again.

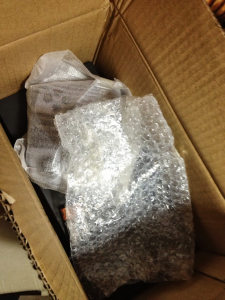
In the gallery below are the only photos I’ve been able to find of this toy. Including some photos from Cosmichobo whose post on an Apple forum caught my eye. He has amazingly been able to find an unopened box, still in it’s shrinkwrap and generously photographed it for this post. The child on that box is not me, that hunt continues. Update – I’ve now been able to find and purchase a small number of struts pieces and amongst those was an original booklet. In that booklet is a picture of the author as a young child! The gallery has now been updated with new photos showing struts in detail.


So, what awards did Struts win? According to the box Struts won the following design awards:

  • 1978 Best Educational Toy
  • 1978 Best Designed Toy
  • 1978 Australian Toy of the Year
  • 1980 Best Plastic Toy
  • 1981 Best Plastic Toy
  • 1981 Australian Toy of the Year
  • 1982 Best Plastic Toy
  • 1982 Australian Toy of the Year

These awards were awarded by the Australian Toy Manufacturers Association. The Industrial Design Council of Australia also awarded and Australian Design Award.

What happened to the Struts name and Trademark?

According to Trademarkia the Struts trademark was cancelled in 1988.

On Thursday, October 19, 1978,  a U.S. federal trademark registration was filed for STRUTS by Motley Manufacturing Agencies Pty. Ltd., Parkside. The USPTO has given the STRUTS trademark serial number of 73189909. The current federal status of this trademark filing is CANCELLED – SECTION 8. The correspondent listed for STRUTS is Oldham, Oldham, Hudak & Weber of 627 First National Tower Bldg., Akron OH 44308, . The STRUTS trademark is filed in the category of Toys and Sporting Goods Products . The description provided to the USPTO for STRUTS is Toys Specifically Multitudinal Part Assembly or Construction Toys.

But what WAS Struts?

Struts was building blocks. About the size of traditional wooden block, but hard plastic cubes and rectangles. These had grooves down each side which thin plastic ‘Struts’ could be slid into, allowing the blocks to lock together. Special connectors also allowed wheel blocks to be used, and these could spin freely. In fact two types of wheel blocks were included. Smooth wheels, and slotted wheels which really looked like plastic pineapple slices. Struts also sold a motorised block! This rather large blue plastic slab was about the size of a thick paperback and had a fairly powerful electric motor in it which could be slotted into any other block.

From memory, here’s my list of parts. Updated with a couple of blocks I’ve spotted in the photos but had forgotten. If you remember any others please comment on the article and let us know. and another update, after speaking with my father and looking at more photos I can add rubber ‘tyres’ to the list and brown axles.

  • Large Block (multiple colours)
  • Small Block (multiple colours)
  • Slotted Wheel (multiple colours)
  • Rubber tyres for slotted wheels (Like a thin ridged rubber belt)
  • Smooth Wheel (multiple colours)
  • Brown Flexible Strips, Short and long
  • White Rigid strips, Short and long
  • White ‘right angle’ connectors
  • Brown ‘right angle’ connectors
  • White Wheel hubs
  • Brown wheel hubs
  • White Center Axles
  • Flat Blocks (multiple colours)
  • Long Slotted Girders (multiple colours)
  • Short Slotted Girders (multiple colours)
  • Blue Motor Box
  • Flat Sheets (Flexible sheets about the size of a paperback)
  • Crystal Disks (same dimensions as the wheels but a slotted disk)

The contents of ‘Box 2’ can be seen in this picture.

Struts Box Contents

The contents of Box 2 as shown on the back of the box.

The booklet that came with some sets of Struts shows a number of different ‘packs’ that were available. The Beginners Pack, Pack 1 (That’s me in that photo!), Bucket Pack 2, Pack 3, and Bucket Pack 4. The booklet also shows a selection of spare parts that could be purchased and has the following blurb:

Struts is a new construction toy manufactured for the world market. It has tremendous scope when compared with other construction toys currently on the market as it caters for a wider age range. It does not require a high degree of co-ordination or precision skill to assemble, yet has more flexibility since it has literally an infinite number of configurations. The only limitations are the imagination and ingenuity of the user. Whilst Struts can be used to create the more conventional artifacts in our environment, such as cars, planes and windmills, etc., it can also reproduce curves and construct geometrical figures. The plastics used have high strength properties, their surfaces resist scratching and use completely safe non-toxic organic pigment colouring. All parts of the toy are virtually ‘unbreakable’ and may be moulded in any colour. Each part is designed such that either a child or an adult may grasp it comfortably.

Struts Educational Toy was also marketed and sold in New Zealand where is may have been manufactured under licence. It was sold by Target in Auckland for Bing Harris Sargood LTD.

And that’s about it for now. That’s pretty much all the information I’ve been able to gather about Struts. I hope this article proves useful for someone who has a box at home and is wondering just what it is and where it has gone.

Ouya – or how to break Kickstarter

It has been a long time since I felt the need to get on my soapbox and post to my Modern Dystopia blog. Life is pretty good and I haventhad anything to complain about. Not that a blog should only be for complaining, but sometimes you just need to get things off your chest.

A while back I helped fund a Kickstarter project for a little gaming console called Ouya. It’s certainly not the first project I have backed, on Kickstarter or other crowd funding sites, but it is one that has been the biggest regret. You see crowd funding is a fresh and in my eyes, a wonderful concept. A new paradigm for how the consumer interacts with designers, ideas people and other creative types. It’s a way to bring into being someone’s dreams and to produce art or products that may never have otherwise seen the light of day. I’m very proud to have backed around 60 projects!  That’s right, I’ve been a bit of a philanthropist and I’ve really loved seeing what has come of this generosity.

So that brings us to Ouya. It was the bright light of Kickstarter. Where previously games had excelled, now an actual console was being offered, and lots of big promises were being made. So I jumped right in on the ground floor and put my money towards the project. It didn’t need my money though, a huge number of people backed Ouya to the tune of over 8 million dollars. But did we really do our due diligence? Did we read between the lines? Why were so many people eager to fork out the cash for what always was going to be a below par console with capabilities already matched in most of homes?

Well a few commentators seem to have had the foresight and wisdom to see what might be coming. Chris over at Theorycraft wrote an article “Why The Ouya will Flop“. In hindsight I wish I had seen and read that article before promising my money. Another article over at Eurogamer also sounded some alarm bells. Again I didn’t read the article which was title ‘The Trouble with Ouya“.

Yesterday morning my Ouya arrived. Like most over people who backed the Kickstarter my Ouya arrived very late, in itself that wouldn’t be an issue. Kickstarter is not a store, it’s crowdfunding, and with any sort of funding there are risks and no promises. Except the team at Ouya (Which for all we know is Julie Uhrman sitting by herself in a rented office somewhere) kept making promises, they kept making misleading statements, and they kept saying we’d be getting our Ouya and it would be amazing. Well it certainly isn’t. It’s probably one of the worst PR disasters I’ve seen in the tech world, and EA are pretty good at PR messes.  Kickstarter updates said everything was good and on track, they said our consoles had been shipped, but it was what they weren’t saying that pissed everyone off.

Ouya didn’t tell us that ‘shipped’ meant they’d simply done from factory to a shipping company. The consoles weren’t actually in transit, they were missing. Tracking numbers were sent out eventually, but with no tracking links. The company listed as the shipping company didn’t actually have the consoles. My console was delivered by Australia Post eventually, not by DHL whose name was mentioned in my email, and the tracking number supposedly matched the format of some other company altogether.

I wasn’t the only one, and almost 30,000 .. yes that’s right 30,000!! comments on the Kickstarter page were going unanswered and being brushed of with friendly, but canned responses. I myself emailed support and had no response until I started speaking out on Twitter and other public forums. When I did get a response it was just boilerplate, and that was proven when I replied and got the same response sent right back. I figured out what had happened, I’m not silly, they palmed off the distribution to a third party and moved on to do other things. Like camp outside E3 like beggars, making fools of themselves in front of the whole world. These sorts of stunts are just that, stunts, and they don’t a reputable company make.

My Ouya arrived. Out of the blue. Luckily I was home because it wasn’t a receipted delivery so the Aust. Post guy could have just left it on my doorstep. I opened the box with mixed expectations. On one hand Ouya had presented itself as a modern, hip company, but I’d also started hearing mixed news on the unboxing. Immediately I opened the box though I knew the Ouya was a joke. It was like getting something from a dodgy chinese online store with no name electronics. The outer box was twice as big as it needed to be. The extra controller I had bought was banging around loosely with only a scrap of bubble wrap giving a vague nod in the direction of protection. Some AA batteries had been dropped in as well.
IMG_6814

The Ouya box itself looked OK, a nice matt charcoal colour. Unboxing revealed another cheap looking controller and the Ouya cube. But pulling these out the rest of the package was just a pile of cables and bits dumped in the box. The cheapest of the cheap, that’s what it looked and felt like. I’ll post pictures below, you can see the unboxing for yourself. That way you don’t have to buy one, I’d hate for anyone else to be this disappointed!

IMG_6818

IMG_6819

Anyway, moving on. Plugging it in and setting it up was a breeze. That was a positive experience, but it was the only one. The minimalist approach is nice looking, but lacks interface cues and standards that we’ve come to expect. Entering text is tedious and unwieldy due to the awful controllers. The D pad cant even move left and right consistently. There is no text prediction and the menus are vague in their meaning.

I downloaded a few games from the miserable selection. Most games looked like they came straight out of 1993 and if I wanted Demos I could get more and better demos in the Playstation store. The whole ‘free games’ thing is a joke. It’s like the entire business model is based around offering the equivalent of ‘shareware’ demos. I wasn’t even able to play some of the games I downloaded because the controls didn’t work. That’s right, out of the box the controllers shoulder buttons were non functional. With no way that I could see to remap buttons this rendered my experience an almost complete loss on day one.

I did play you Don’t Know Jack. However I can play that on anything, and at least on other devices I diont have to put up with controller buttons that get stuck down every second button press. Seriously, I paid MONEY for this thing???

OK. Rant over. I’m really sorry that a project like this, with such a huge number of backers may have soured 30,000+ people towards future Kickstarter projects. if you backed Ouya I suggest you treat it as an isolated case. Of course use due diligence with any project you may want to support, but on the whole Kickstarter is a fun place full of great ideas. Some may not pan out as well as hoped, some may fail or not live up to expectations, but they are people trying to do things just a little bit differently, and that should always be encouraged.


Swapping Hard Drives in an Acer Laptop

I thought it was about time that this blog actually had some useful information rather than an unending stream of Twitter posts.

My Acer Aspire notebook has been giving me all kinds of hell recently, and I was pretty sure the HDD was on the way out. Actually I could pretty much guarantee the hard drive was… cactus.

It was so bad that although the laptop would boot, doing basically anything would result in a total lockup and force a hard reboot. So today I bit the bullet and went and bought some new RAM, and a nice shiny Seagate Momemtum XT Hybrid drive (500gb). However, Acer, in their wisdom don’t actually supply recovery disks any more. You have to run the recovery from the HDD, a bit problematic when you a) want to retain all your data, and b) want to replace the drive

So here is how I did it!

I used two software tools, 2 external 2.5″ SATA USB enclosures and another computer to achieve this.

  1. HDHacker, which i found here on this excellent page about backing up your MBR
  2. Easeus Partition Master

These were both installed on my desktop PC to facilitate the process. So, here’s how it was done, and I’ll leave out all the bits that went wrong, so just be sure to follow the instructions here, this is what went RIGHT!

  1. Remove the original drive from the laptop and insert into enclosure 1
  2. Put the new HDD in enclosure 2
  3. Plug both drives into the desktop PC via USB.
  4. Run EASEUS and you will see that the ACER laptop drive has FOUR partitions.
  5. These partitions include TWO hidden partitions, the partitions should be: PQSEREVICE, ACER, DATA and an UnNamed partition
  6. Use EASEUS to COPY the PQSERVICE partition to your new drive. Make sure you label it PQSERVICE and also set it as a PRIMARY partition. Do NOT assign a drive letter.
  7. Apply the change (Do this after EACH step!!)
  8. Wait… the copy operation will take a while, and may even seem to be going nowhere at times. Just be patient, get a coffee.
  9. OK, now we can CREATE your ACER and DATA partitions on the new drive. Don’t copy them or you’ll be waiting all night. You can set the size of these to whatever you like, but be sure to allow space for the 4th partition at the end. Take note, these are BOTH set as PRIMARY partitions. This drive must match exactly the original drive in the layout if not the size of it’s partitions. APPLY YOUR CHANGES
  10. Now the last partition. Copy this one, it is only a gig or two so doesn’t take too long. Make sure it has NO LABEL, and NO DRIVE LETTER. Again, it’s a PRIMARY partition. APPLY!!!
  11. Now, we’re almost done. But the new disk needs a custom Acer MBR (master Boot Record), and we’re going to have to copy that from the old drive.
  12. Run HDHacker (on your Desktop PC) and select “Physical Drive (MBR)” and your drive (if it was drive 2 in EASEUS it may be drive 1 here)
  13. Now click Read Sector From Disk, and then Save Sector To File which will make a copy of the MBR and save it to a file on your Desktop PC. Oh and you can tell it’s the Acer MBR because you should see the word Acer in all the gobbledegook.
  14. Now select the NEW drive, click Load Sector From File and make sure you open the file you saved in the previous step. Then Write Sector On Disk. Make sure you are writing this to the NEW laptop drive. Be very careful here, you can potentially screw up your desktop if you write this file to your desktop drive by accident.
  15. OK, so we’re just about done. You should have a new HDD with a set of partitions that look exactly like your old one, but with no data on the ACER and DATA partitions. It has a MBR that is an exact duplicate of your original disk. The only other thing that ‘may’ trip you up is that Acer set a password on the recovery process.
  16. The recovery password…. this may not be needed. The default Acer Recovery password is ‘0000’ but in case you changed it, you may like to make sure now instead of later.
  17. Using EASEUS on your OLD drive set the PQSERVICE parttion as Active and assign a drive letter. Now APPLY!
  18. Open up a command prompt (you know, go to ‘Start –> Run and type CMD )
  19. Now change to the drive letter you just assigned, and run EDIT
  20. Open the file AIMDRS.DAT that is in the root of the PQSERVICE partition. You should see the password as plain text. It’s that easy.
  21. Now close that, exit the command prompt and reset the old partitions to how they were.
  22. Time to pop the new drive in your laptop, and turn it on, press F2 to go into your system BIOS where you can check the drive is detected and your boot order is correct. Save settings, exit and be prepared to press Alt+F10 at boot to enter recovery mode.
  23. That’s it, you are on your own from here.

Now this is how I did it. There’s a few other guides around, and it always pays to read up on the subject before tackling something like this. I hope however I’ve made this process of changing your laptop hard drive as straightforward as possible.